|
4 great dimensions, 4 great programs |
|

new online manual - see links for more
brand new upgrade with many superb enhancements:
-
library system - now all the 4D software shares the same library, so that there is guaranteed compatibility between each program
-
object based - now rather than animating models, sounds and cameras using separate methods, now they are all controlled under the same system, as different object types.
-
lighting - you can now add a 'light' object to your animation to highlight areas of your models
-
multiple phase animation - you can now animate each object in up to 3 separate stages
and of course it still includes the original basic systems
-
multiple mesh models - you can now load models which are formed of multiple meshes
-
movement - you can set up models to move at a particular time to a particular position
-
rotation - you can set up models to rotate at a particular time a particular rotation
lets look at independent applications:
4D edit
This simple application allows you to create 3D model from blocks.
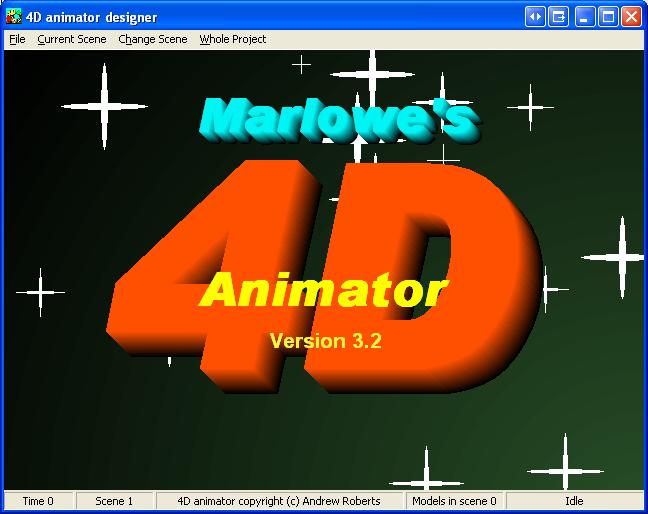
4D animator
Updated program that allows you to build amazing quality 4D animations, from 3D models.
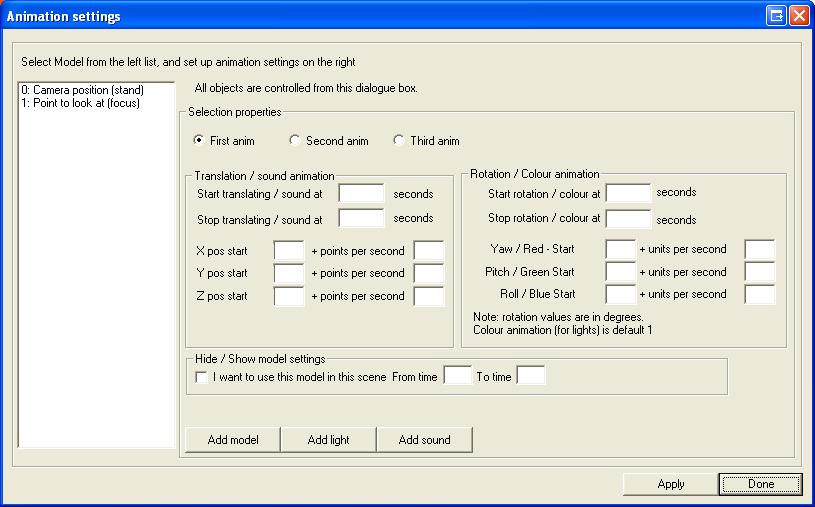
You use the animation settings dialogue box for everything . . .
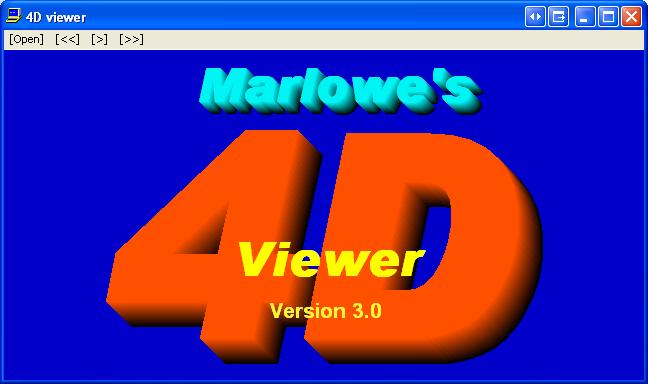
4D viewer
Viewer for the 4D animator file format
4D bitmap
This is the same as 4D viewer, ezcept it outputs a stream of bitmaps, so you can create movies.
Examples
Stunning 4D productions - with lighting (from star trek page)
Original 4D page
|
4 great dimensions, 4 great programs |
|
Marlowe's 4D package now has 4 fantastic programs . . .
-
4D edit - block based 3D editor, create 3D models from 2D displays.
-
4D animator - load the models from 4D edit into 4D animator to easily create high quality animations and movies, with multiple scenes you can take several camera angles, as well as having different models in different scenes, this very versatile program lets you make stunning 3D movies to share with your friends. (see the example movie on the left)
-
4D bitmap - converts 4D animations into a bitmap stream, for importing into other animation programs to be built into avi's and gifs.
-
4D viewer - free viewer for 4D animator, view the animations you created with 4D animator with this free viewer program. (download now - see left menu)
Marlowe's 4D also comes with supporting utilities (included free with any 4D product). . .
-
B3D viewer - test your b3d models before adding them to 4D animator
-
3D mesh converter - converts .an8 files into .b3d files, (requires Anim8tor - search google)
-
Tutorials - to get you started with 4D
-
Support from the writers at Marlowe Online
-
Ongoing updates
New version 2.0 out now, with many additional features, and a fantastic demonstration animation (with audio) in Hi and Low quality to suit your PC specification (please read the pop up credit file, to start the animation, close the credit notepad window). Download and 'save as' the version 2.0 Viewer from the left, and the demo file. Then 'open with' the demo file and choose open with the 4d viewer.
Version 2.0 also comes with a converting method to turn .3ds meshes into .b3d models. And a quick b3d viewer that lets you try your models before using them on 4D animator.
Version 2.8 comes with a multi model facility - this lets large model be loaded as several smaller sub models - increases compatibility with some video cards. Many bug fixes.
Also try the new 4D animator v2.8 demo, (save is disabled). Help is also available to download.
To purchase a product click here
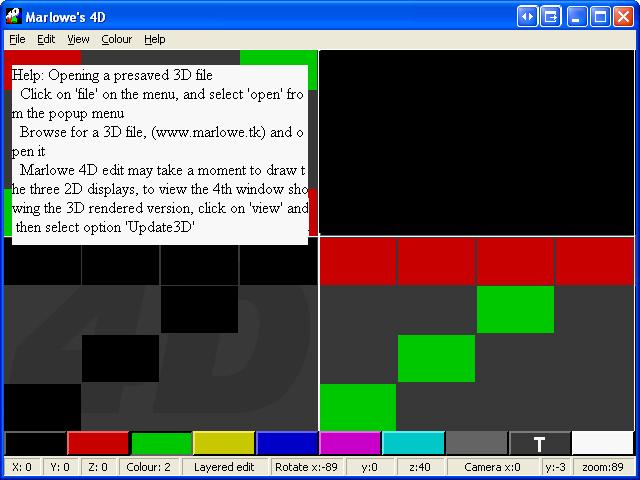
4D edit version 1.4
On the screen there are 3 2D views, showing the front, side and top views.
The 3D images are based on a bitmap system, unlike Microsoft paint, 4D edit uses a 3D bitmap, instead of paints 2D bitmap.
To draw a single dot, (3D cube) you need to tell the computer all 3 pieces of information, the x, y and z coordinate.
To do this you need to click in at least 2 different windows, as each window only gives 2 axis. As you click in each window you will notice it highlights the axis info in the other views.
In a 3x3x3 grid, (1-27)
1 2 3
4 5 6
7 8 9
If I click on the 5, I do not know whether i want the one behind it, or the one behind that, therefore, you need to click in another window, (including the other axis).
Once the computer knows where to put a cube, it will draw one.
To check it is right, click on view -> update3D, or press F5.
You have change colour menu at the top.
New help for version 2.8 download from left menu.
Tutorial for version 1.4 (still useful) - read below
In this tutorial we will be showing you how to animate a model produced with 4D edit. 4D edit can create B3D files, which contain a model. 4D animator is designed to move and rotate those models.
To start either create a model in 4D edit using the tutorial, or download a ready made one. Enclosed with this tutorial is a model of a Plane.
Open 4D animator, after a few moments you should see a large white screen, with a menu bar above it, and a status bar below. On the menu bar select FILE, and choose SAVE AS. Specify a position to save the file.
Next go to the menu, and choose WHOLEPROJECT, then select ADD MODEL. A dialogue box with pop up. Either type the path of where the file is on your computer, or click browse, and use the Windows Open navigator to help you.
Once you have found the file you wish to animate, give the model a name, to do this enter a useful name in the box below, and click LOAD FILE.
Please note, 4D animator will add this model to every scene. There is no need to keep loading the same model into 4D animator.
In 4D animator the different frames are called scenes. Scenes can be in any order are are numbered. We will show you how to order the frames later.
Return to the WHOLEPROJECT menu and choose INSERT WAV FILE, a dialogue box will pop up, from here, (in much the same way as you did with 'add model') locate and open a sound file, giving it a name. Then click OK. There is a sound file included in the zipfile.
You have now added 2 files to the animation, one model, and one sound file. These are global files - they can be used in any local scenes.
Global in this case refers to the whole project, (the collection of scenes)
Local in this case refers to the individual scene.
In the status bar, (bottom) there is Scene Number written, using the up and down cursor keys, locate scene 1.
Having chosen the scene we wish to edit, go to the CURRENTSCENE menu, and choose ANIMATION PROPERTIES. A large dialogue box will pop up. This allows you to read, and alter the animation for the current scene.
Notice that the name you assigned to the model of our plane, is listed in the left Listbox. If you click on this it will display the current animation on the right side.
Since we want the model to be displayed in this scene, we will make sure the box at the bottom is ticked.
We are going to make the plane fly towards us and underneath us.
See the Translation area, we are going to make the translation, (movement) last for 10 seconds. So type in the stop time, '10'. Since we want it to start animating immediatly, make sure there is a '0' in the start time.
So that we can make the image start from far away, enter a large number like 500 into the Z pos start box.
Now enter a number which will bring the plane towards and beyond us in 10 seconds, the number you enter is the movement that will take place each second. Therefore 50 would be a good number.
Since we want the plane to fly under us, and not into us, set the Y start pos to -10.
Having done that, click DONE.
If you press the right cursor key, you will see the preview of the animation, to play in more real time, hold down the shift key.
To activate the sound with it, go to the CURRENTSCENE - SOUND CONTROL and setup the sound to start at 0.1 seconds, (note setting it to 0 will stop it being played in that scene)
To make sure the camera follows the plane as it flies, go to the CURRENTSCENE - CHANGE EYE FOCUS POINT and set the scene up to look at the model.
Before you can compile it to run as a 4D viewer file, you need to set up the scene order. To do this go to WHOLEPROJECT - SCENE ORDER, and select from the drop down menu the slot you wish to add a scene. Use the drop down menu to choose the slot, and the Listbox to choose which scene fills that slot. In our example, set Slot 1, to scene 1.
To set the background colour go to CURRENTSCENE - SCENE SETTINGS and alter the background colour by entering a Hexadecimal 6 digit RRGGBB number.
To compile go to FILE - COMPILE and make an A3D file. Then try it with 4D viewer.
version 2.8
Allows you to convert a 4D animation into a stream of bitmaps, (which can be loaded into an animation program and turned into an avi or gif).
Acts exactly as 4D viewer, except it creates a folder 'anim' full of bitmaps, res 320x240, 24 frames per second, and numbers the frames.
version 2.8
Run the program and then open the animation file into it.
Buttons:
[Open] : Opens a file
[<<] : Go back one scene
[ > ] : Play/Pause
[>>] : Go forward one scene